
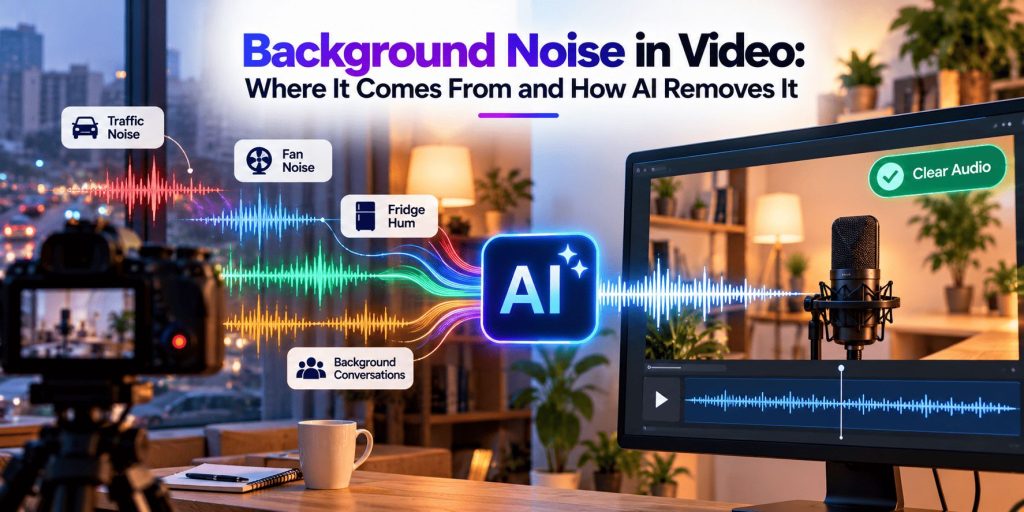
You shoot a clip that looks great. The light is right, the framing is steady, and the person on screen says exactly what you hoped they would. Then you put on headphones and hear a low hum under every sentence, a fridge cycling on in the next room, or traffic that somehow wasn’t there when you were filming.
Almost everyone who makes videos has been through this. Viewers will forgive a slightly soft image, but they tend to click away when they have to strain to hear someone talk. Poor audio makes a video feel amateur faster than almost any other flaw, and it’s often the one people notice last, when it’s too late to reshoot.
The good news is that noise is far more fixable than it used to be. To fix it well, though, it helps to know where it comes from, because the cause decides the fix.
Where background noise actually comes from
Noise isn’t one problem. It’s several, and each behaves differently.
Steady, constant sounds. Air conditioners, computer fans, refrigerators, studio lights and electrical hums belong here. They sit at roughly the same level for the whole recording, which makes them the easiest kind to reduce, because the pattern doesn’t change.
Sounds that come and go. Traffic, a dog barking, a door closing, a colleague walking past, keyboard clicks, a notification buzzing on a desk. These are unpredictable and often land in the middle of a sentence, which makes them harder to remove without touching the voice.
Room sound. Echo and reverb aren’t noise in the usual sense, but they make speech sound distant and hollow. A bare room with hard walls and a bare floor will do this to even a good microphone. People often describe it as “bathroom audio,” and it’s one of the most common complaints about home recordings.
Equipment problems. Cheap or badly placed microphones pick up hiss. Cables pick up interference. Phone recordings are often compressed before you ever touch them, which adds its own roughness. Wind across an unprotected microphone is a special case, because it creates a heavy rumble that can cover speech completely.
Microphone distance. This one is easy to miss. The further a mic is from the voice, the more room sound it captures compared with the speaker. A microphone across a table will always sound noisier than one a hand’s width from the mouth, even if the room is identical. Camera-mounted microphones suffer from this a lot, since the camera is usually several feet from the subject.
Digital leftovers. Video that has been exported, re-uploaded and downloaded again can pick up compression artifacts that sound like a thin, watery shimmer. It isn’t background noise in the physical sense, but it gets lumped in with it, and the cleanup approach is often similar.
Once you can name the type of noise you’re dealing with, you can choose a sensible fix instead of guessing.
Why you can’t just turn the noise down
The obvious fix is to lower the volume. It doesn’t work, because noise and voice share the same recording. Turn the whole thing down and you lower both.
A smarter approach is an equalizer, which reduces specific frequency ranges. If you’ve got a low rumble, cutting the lowest frequencies helps. But a human voice covers a wide range of frequencies, and much of the noise sits in the same range. Cut too hard and the speaker sounds thin and muffled. Cut too little and the hum stays.
For years, serious noise removal meant using spectral tools, sampling a few seconds of “room tone,” and carefully adjusting sliders until the hiss went away without making the voice sound like it was underwater. It worked, but it took patience, a trained ear and a fair amount of trial and error. For a creator publishing several videos a week, that was a lot of time spent on something viewers should never have to think about.
How AI changes the process
Modern noise reduction tools use machine learning models trained on very large numbers of audio samples. Instead of treating sound as a single signal to be filtered, they’ve learned what speech typically sounds like and what usually isn’t speech. That lets them separate a voice from a hum, a hiss or a busy street, even when the two overlap in frequency.
In practice, the benefits come down to a few things:
- You often don’t need a noise sample. Older tools usually wanted a few seconds of silence to learn from. AI-based tools can generally work without one, which matters when you’re handed footage where nobody thought to record room tone.
- They cope better with changing noise. Because the model is looking for speech rather than a fixed pattern, it handles sounds that shift over time far better than a static filter does.
- The result tends to sound more natural. Voices keep more of their warmth, because the tool is trying to protect speech rather than simply removing a frequency band.
- Anyone can use them. You don’t need to understand spectrograms or decibel curves to get a decent result.
None of this is magic, and it’s worth being honest about the limits. If a recording is badly distorted, if the noise is nearly as loud as the voice, or if someone is talking over loud music, there’s only so much any tool can recover. How well it works depends on the original recording and on how much the noise overlaps with the speech. The cleaner the source, the better the outcome.
That’s also why the way a tool is designed matters as much as the technology behind it. One-click noise removal is only helpful if you can steer the result when it goes too far. The invideo audio editing tool is built around that idea. You upload a recording, tell the editing agent what you want in plain language, and it does the work on your timeline. Because the output stays editable, you can decide how much processing the voice actually needs instead of accepting whatever comes back.
Putting it into practice
Here’s what that looks like in a real edit. You upload your video or audio file and give a direction such as “clean up the voices and balance the speakers.” The agent carries out the work directly on the timeline, so you aren’t bouncing files between separate programs.
What makes this approach comfortable is that you aren’t locked into the first result. The agent’s work lands on tracks you can edit, and you can control how much noise processing is applied. That matters, because over-processing is the most common mistake in noise removal. Push it too far and speech takes on a slightly robotic, watery quality. Backing off a little usually sounds more human, and a touch of leftover room sound is far less distracting than a voice that sounds synthetic.
The timeline itself is a proper multitrack setup. Voice, music and sound effects can live on separate tracks, each with its own level, panning and effects. That’s useful for noise work in particular, because you can treat the dialogue without disturbing a music bed or a sound effect sitting beside it. You can also switch effects off and on to compare the cleaned version against the original, which is the quickest way to catch yourself overdoing it.
Noise cleanup rarely stops at noise, either. Once the background is under control, a few other tools lift a recording further:
- Equalization. An eight-band equalizer lets you reduce muddy low end, soften harsh frequencies or bring more presence to a voice.
- De-essing. Sharp “s” and “sh” sounds often stand out more once the noise is gone. A de-esser softens them without lowering the whole recording.
- Click removal. Small mouth noises and digital clicks can be reduced with a dedicated effect.
- Compression. This evens out the gap between loud and quiet passages, so viewers aren’t reaching for the volume button every few seconds.
When you’re finished, you can export the audio as WAV, AAC or Opus, or include the mix with your finished video. There’s also a loudness target in the export controls, which helps you prepare the output for the platform you’re publishing on.
A short workflow that holds up
If you want a simple routine, this one works for most talking-head videos, interviews, tutorials and podcasts:
- Listen first. Wear headphones and identify what kind of noise you’re dealing with. A steady hum and a passing truck need different treatment, and you’ll hear problems on headphones that laptop speakers hide.
- Reduce noise lightly. Start with a modest amount and increase only if you need to. It’s much easier to add more than to undo damage.
- Fix the tone. Once the noise is down, use EQ to bring the voice forward and take the boxiness out.
- Level it out. Apply compression so quiet words don’t disappear and loud ones don’t jump out.
- Check the whole mix. If you have music or effects, make sure they sit comfortably under the speech.
- Compare with and without processing. Bypass your effects and listen again. If the untouched version sounds closer to a real person, ease off.
- Listen on a second device. A phone speaker is a good test, since that’s how plenty of people will watch.
Common mistakes to avoid
Even with good tools, a few habits cause trouble again and again.
⚠️ Treating noise reduction as a cure-all. It’s a repair tool, not a replacement for a decent recording. The best results come from a clean source plus gentle processing.
⚠️ Removing every trace of the room. A recording with absolutely no ambient sound can feel eerie and unnatural. A little natural room tone makes speech feel like it belongs in a real space.
⚠️ Fixing noise before fixing levels. If the recording is too quiet, boosting it afterwards also boosts the noise. Get the volume reasonable first, then reduce noise.
⚠️ Ignoring cuts. When you remove a section of a recording, the background noise often changes abruptly at the edit point. Short fades and crossfades smooth that out so the cut doesn’t jump out at the listener.
⚠️ Skipping the final listen. Always play the finished version from start to end. Small problems, such as a missed click or a sudden change in tone, are easy to overlook when you’re only checking short sections.
Prevent what you can
The best noise reduction is the noise you never record. A few habits pay off every time:
- Record in a smaller, softer room. Curtains, rugs, cushions and sofas absorb echo surprisingly well.
- Turn off fans, heating, air conditioning and anything else that hums before you press record.
- Put the microphone close to the speaker’s mouth.
- Use a windscreen outdoors, even an inexpensive one.
- Silence phones and notifications, including the ones in other people’s pockets.
- Record a few seconds of the room before anyone speaks. It gives you something to reference later and helps with troubleshooting.
- Do a short test recording and listen back before the real take. Two minutes of checking can save two hours of repair.
The takeaway
Background noise comes from the room, the equipment and the way a recording is set up, and each source calls for a slightly different fix. AI has made cleaning it up far less technical than it used to be, but the principle hasn’t changed: protect the voice first, and use the lightest touch that gets the job done. Capture clean audio where you can, treat what’s left with care, and always trust your ears over the settings.
Do that consistently and your viewers will never notice the work you put into the sound. They’ll just hear someone speaking clearly, which is exactly the point.